Have you ever wished for a faster way to attach a file to a record in Maximo? Or even attach multiple files without even opening Maximo? If your answer is ‘yes’ to any or all of these questions, then keep reading...
Maximo and Attachments - Drag and Drop feature
BPD Zenith has developed a custom control that can be added to any application in Maximo that supports attachments. In the ‘Asset’ application, rather than using the ‘Attachments’ link to add files through multiple clicks, you are only required to drag the files you need and drop them into the drop zone of the control.
In this article, we will demonstrate the following:
- How to use Control - Attach file(s) to Maximo record using Drag and Drop Custom Control
- Maximo Attachments by Email - ‘Attachment by Email’ to Maximo record without needing to open Maximo by sending an email with an attachment.

How to use Control:
1. Deploy Control to Maximo.
2. In application designer, open Control palette and you’ll find ‘BPD Drag and Drop’ control. 3. Drag and drop the ‘Drag and Drop’ Control (😊) to application. If you are seasoned in manipulating applications through application designer, you can reorganise your application by creating a separate section and placing Control in that section.
4. Go to Asset application (or the application of your choice) and select record 5. Pick the required files from desktop and drop them into drop zone of control. These attachments will be attached to the Maximo record.
~ Go to the application of your choice and select record. Now your Drag and Drop control should be good to go! ~
Maximo Attachments by Email
The next logical step would be to attach the files to the record in Maximo without physically needing to open Maximo. This feature is particularly useful in cases when you are not able to access Maximo, avoiding the need to extract files from emails to manually attach each one to the respective Work Order.The solution is simple;
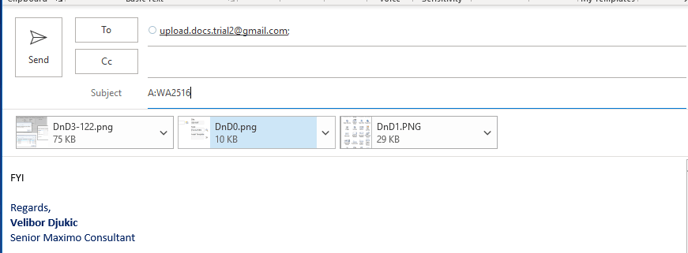
1. Create email
2. Attach files
3. Put in subject DOC:NUM, where DOC is the short form of the application file you are attaching e.g. A – Asset, PO – Purchase Order, WO – Work Order… and NUM is respective Asset Num, PO Num, WO Num etc..
4. Enter the mail address that Maximo is listening to and
5. It’s done… now you just need to send the email!
After a couple of minutes, you will receive a feedback email.
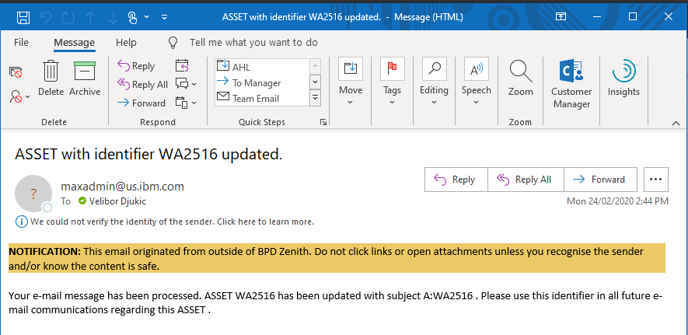
This email notifies you that your document has been updated and your file(s) are attached.
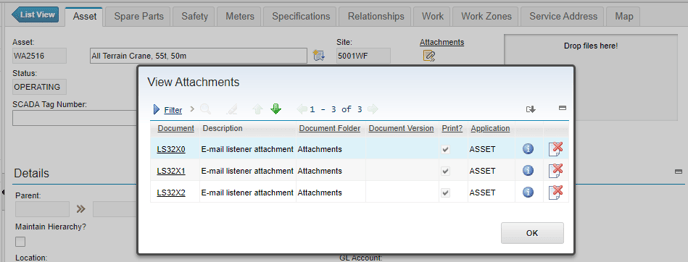
In Maximo, the record looks similar to the following image. We can now see 3 new Maximo attachments have been added to the Asset.
I hope you enjoyed these two very useful pieces of functionality.
We are always coming up with new ways to add value to your Maximo experience by developing these value-add features. If you would like to know more about this or any other product BPD Zenith is developing, please get in touch - we'd love to hear from you!